Although it is now the tenth day into September 2020, everything seems to move slowly these days – as though experiencing some sort of time lapse – or is it a ‘fast forward’??? Time seems to slip by almost unnoticeably. Soon it’ll be Xmas!
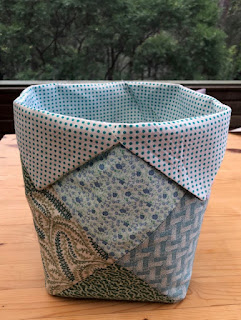
Not that I was ever a fast worker when it came to creating something new, but the motivation to engage in and push on with a meaningfully creative project seems to have seeped out. So instead, I found some already cut 5x5” squares given to me by a friend in my stash. I’m not sure what was intended for these patches, which came to me in two colour ways, green and blue. But I have decided to go for the ‘practical’ again, by taking the most obvious way out and following step-by-step instructions for a fabric basket – maybe for a pot plant. Of course the final size depends on the size of the patches you start with. This one was about 200x180.
Forming the outside cover
The steps seem to be more complicated at first glance than they actually are – to create the outcome of a spiral effect. Hopefully the images will show how simple it is to create it. It starts with four times four (4x4) patches, contrasting light and dark in (though that is up to personal choice) and joined to end in four straight lengths. These are joined in such a way as to create the base for the pot, with each length, exiting out from the join in a spiral formation. Thinking about practical use for the outcome, I started with all darks to form the base.
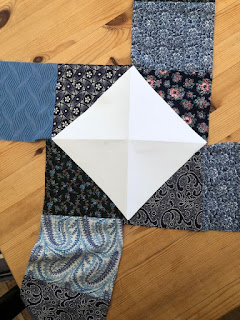
When the sides are pulled up and joined, the lower squares will form a diagonal square for the base, and points will be formed by the extra square from each join. When the lining goes in, these external squares will form the over-flaps at the top, to create extra interest. So the basic shape of the pot of formed – and is floppy. Then there is the lining.
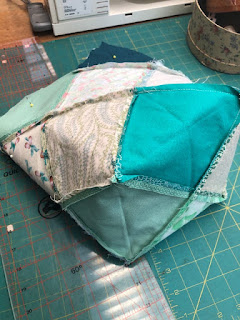
I've changed to the green pot here to illustrate the formation of the bottom of the pot.
The lining
Finding a simple and compatible contrast for lining the pot – but no restriction applies here! Remember my aim is to use what is in my stash! For the green pot the dots seem to suit. So I made sure I had a large enough area to cover the length of the four strips, (minus the 1/4” seam allowances for length) and the four widths, in this case 5’’ – so a little over 20” wide, and roughly 18” in length. This one piece can be fused with lining of whatever stiffness you prefer, to help the pot stand alone - and then cut into the desired four lengths, to be treated in the same way as the outside fabrics: create a windmill, join the bases and side, ready for the external pot to be place over it, right sides facing for the final joining across the top to form the four peaks. It sits neatly like this when folded.
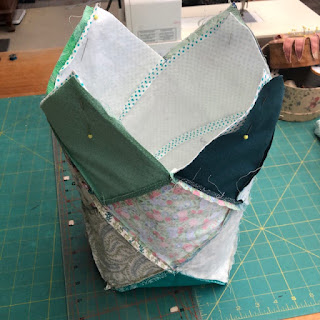
At this stage the pot is inside out, and about 2-3" gap in one of the walls of the lining needs to be left open in order to pull the inside out – that is after the top point have been stitched securely. Once pulled through this small opening, (which can be quite a struggle depending on strength of the stiffening used), the points at the top can be pushed through to become sharply pointed, and finally the aperture closed with hand stitching. You could finish with a row of decorative stitching around the top - or some hand embellishment. Of course at all stages of the process up until this, seams are pressed open to help flatness in the two layers. Et voila!